Showing posts with label DIY. Show all posts

Thursday, March 27, 2014

Easy DIY Natural Room Freshener

I have been yearning to make my own potpourri, fragrance diffuser and natural room freshener for quite some time now. My family was going high on Ambi-pur and chemical overdose of anything bothers me. So finally I have made a very very easy room freshener and my room feels so nice and fresh these days.


We have an artificial lake here surrounded by a vast golf course. Since childhood, I have admired the small wooden pine flowers scattered on the ground under those trees. Recently it just striked me I can use those for making a room freshener. So during my recent visit, I collected them and brought home.

Wednesday, April 3, 2013

How to Make Your Own Natural Loofah Sponge

I am back with another DIY. Let's learn how to make your own 100% natural loofah for exfoliating your body during bathing. A loofah like this costs anywhere between INR 60 to INR 250 in the market, when you can easily get it for free.


I am blessed to have grown up in completely natural surroundings, close to nature. We used to use this loofah often during childhood. A few years ago, I was surprised to see it is beautified and sold in the market for a good price.


Make 100 percent natural loofah sponge


Natural Loofah, loofa or luffa is the fibre of dried bottle gourd. It grows on a vine and is easily available in many countries. In India, it grows in abundance August onwards and is a winter vegetable.

Bottle Gourd loofah
Image Source: 1
If you do not pluck it from the plant, the gourd dries on the vine and looks like this. 
Dried bottle gourd natural loofah

Please note that the plucked bottle gourd bought from the market would NOT dry into this. It needs to dry naturally while hanging from the plant.
Natural loofah sponge from dried bottle gourd
Pull out the fibers to easily remove the dry peel
When you remove the dried peel, you expose this beautiful golden natural loofah. 


Natural Loofah DIY

It is modified into different shapes and the price increases accordingly.

Here I cut it into two pieces simply using a pair of scissors.

DIY natural loofah bath sponge

The bigger half is my loofah. You put a thread or ribbon through it and it looks like the first picture above. Make sure that the cut ends on both sides are not abrasive. It they are sharp, just rub them against a rough surface to smoothen the edges.

HOW TO USE?

Just wet it a little and scrub on the body after applying soap. Else pour your shower gel directly on the wet loofah and scrub. You need to dry it everyday else it will catch fungus and won't last long. If you can get your hands on it in a village/kitchen garden or anywhere else, make many loofahs and stock them. Replace whenever required.

Now let's see what I did with the smaller half.


Ta da, you can be creative and make many other things out of it. Varnish it. You can even dip-dye it in food color or cloth color and make colored flowers in a dry flower arrangement. I used to do that as a kid and they look really beautiful.


Natural loofah sponge flowers how to make
Loofah Flowers dipped dyed in food color


Natural loofah flowers dip dyed how to
Leave them to drip dry hanging from a cloth line

OTHER USES:
  • You can turn it into powder using a mixer blender and keep in the bathroom. Just add to your shower gel when you want to use it as a body polish. It is the same natural loofah power which is also used in The Body Shop body polish and other brands. I think it may be a little too abrasive to use on the face, so do NOT use in a face wash.
  • You can use it as a scrubber when washing utensils.
  • If you know soap making, turn it into a loofah soap :) See THIS interesting loofah soap-making article.
  • Use it as a moss for small indoor creeper plants. Else tie many of these around a long rod and fix it into a pot for your money plant or other creepers to creep up.
Loofah Soap
How did you like this article. Do let me know :)

The ZINIO international giveaway is now closed and the winners have been announced on our Facebook Page.

Friday, March 29, 2013

DIY Natural Skin Serum for Oily Combination Skin

Today I am going to share with you a 100% natural DIY Skin Serum for Oily or Combination skin, also helpful for people with an Oily T-Zone. It acts as a skin lightening, brightening and pore tightening serum. I am sure most of us know about it but we haven't recognized its true worth.

I am taking about the natural serum extracted from Orange Peel. When you peel an orange, you must have noticed small droplets of liquid suddenly squirting out into the air, and the heavenly smell of orange spreads around. Some of this liquid also settles on your hands most times.

DIY Natural Skin Serum for Oily Combination Skin

This serum is a nectar gifted to us by Mother Nature. As a kid, whenever we used to eat oranges, we used to spritz this serum into each others' eyes for fun.

100% Natural Skin Serum for Oily Combination Skin
Can you see the droplets I squeezed out?
HOW TO EXTRACT?

I am sure we all already know how to do this :) Still explaining with tips.

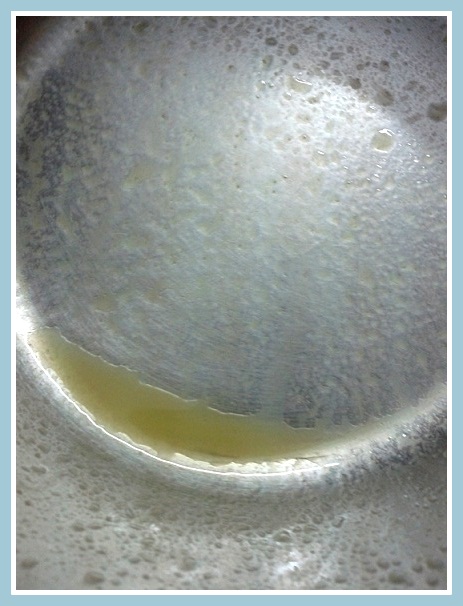
Take a clean deep bowl or a big plate. Peel an orange. Fold and bend a small piece of the Orange peel near the surface of the utensil. Small droplets of orange serum will squirt out and settle on the plate/bowl.

How to extract natural skin serum from orange peel

Similarly spray out the drops from all the bits of the peel. Also collect any  remaining liquid on the peel and fingers by scraping against the edge of the bowl. Tilt the utensil so all drops flow down to one place.

Orange peel skin serum for skin lightening, brightening and pore tightening

This is the serum extracted from the peel of one medium sized orange. Don't laugh at the amount. This much is enough to lavishly cover your face and even part of your neck. It spreads really well and is quite strong. So even a few drops are very precious and useful.

HOW TO USE THIS NATURAL SKIN SERUM?

Apply immediately to face and neck, just like you spread water on face. Leave for 3-5 minutes and enjoy the heavenly scent, while you relax or do your work. Wash with plain water and preferably let the skin air dry.

People with an Oily T-zone: If it dries out the skin on your remaining face, use only on the T-Zone.

This skin serum may feel a little oily while washing off, but it will actually cleanse the extra oil from your skin. Skin will feel dry for some time after washing. It will start glowing within half an hour or so. People with very dry skin can give it a try too and see if it does not dry them out too much.

BENEFITS:
  • 100% Natural and Easily available
  • Free of Cost
  • Contains Orange essential Oil (pure Vitamin C)
  • You will notice glow on your face within one use
  • I noticed tightened skin pores from 1st time itself
  • It starts lightening dark spots/scars from wounds/pimples within 2 uses onwards.
  • Naturally exfoliates skin to reveal beautiful skin the next day
  • It is not at all messy.
  • Leaves a cooling sensation on the skin.
  • The natural aroma of orange lingers on your skin for quite long.
So next time you eat an orange, you now know what to do with the peels.

Did you know dried and powdered orange peel is also used in face packs and fresh orange peel is used in cakes and other dishes? But please make sure to wash any dust before using.

Oranges are in abundance at present (at least in North India). If you have oranges easily available, do try this skin serum and let me know if this benefits you too. I will be happy to know.

Thursday, October 25, 2012

Homemade Aloe Vera Gel Shine, Moisture and Volume Boost Hair Masks: Very Easy

To know how to extract pure and fresh Aloe Vera Gel directly from the plant, check my article HERE. The internet has more than enough information on how to use this gel, right from incorporating it into food to making skin care and personal care recipes out of it. I will here be briefly sharing with you some of the uses I have made of this gel and my experience.

Home Made Aloe Vera Gel Shine, Moisture and Volume Boost hair mask
Click Here to read How to Extract Aloe Vera Gel at home

Pure Aloe Vera Gel Shine and Moisture Boost Hair Mask

This Hair Mask can be used before shampooing or after shampooing as per your choice. This was suggested by one of my blog readers Pratibha Rangavajulla, who has great interest in reaping benefits from natural and organic products easily available around us.

Aloe Vera Gel after Shampoo hair Mask (As used by Pratibha):

Step 1: After shampoo, either towel dry or gently wring out excess water from your hair. Spread the Aloe Vera Gel into scalp and hair length and leave on for minimum 10 minutes.  Rinse off with plain water. 

Step 2: Run a few drops of Jojoba Oil through your towel dried hair, just like a hair serum. This will give immense shine and softness to your hair and will act as a great styling agent too. As per Pratibha, whenever she does this, her hair dry to a salon shine finish.

Aloe Vera Gel Pre-Shampoo Hair Mask:

When I first used pure Aloe Vera gel in the hair, I felt that the plant smell remained in my hair for one day. So I decided to use this pre-shampooing. Blended Aloe Vera gel has the same consistency as a shampoo and when it touches the scalp, it fluffs up a little and easily spreads into the scalp. 

Rub into scalp/hair roots just like shampoo and use the remaining liquid to cover hair length. Use lavishly and leave on for minimum 10 min or more as per your choice. Rinse off with plain water (warm or cold). Shampoo as usual. You will notice immense shine and a very soothing sensation in the scalp.

MY EXPERIENCE: 

I had very sensitive scalp which used to itch and burn on using hair color. I have been using this hair mask some 4 days before I color my hair and within 2 uses, my scalp is 98% healed. I applied color yesterday and there was no burning except for a very small area in the scalp. It gives a very soothing and cooling effect and is superb for summers especially. The scalp immediately feels fresh and all itching/burning is gone. My hair got an immense moisture and shine boost.

Aloe Vera Gel Shine and Volume Boost Hair Mask:

Use the same hair mask as above with the juice of half a lemon added to it. This will be comparatively runny than pure aloe vera gel and will drip a little. So wear an old shirt or shower cap. I kept for 10-15 minutes and it gave not only shine but immense volume to my hair. I did not use a conditioner nor Jojoba oil since I color my hair and the oil wears off the color. 

People with freshly colored hair do NOT use the lemon as it will wash out some of the color. But you can use it a few days before you color/touch up next.

Note:
  1. Filter out the plant fibres in the gel using a wide-pore sieve otherwise the fibres dry up on the hair strands and it becomes quite a task to remove them.
  2. You will not feel any difference while your hair are wet. Once water dries out of hair, you will notice the shine and volume.
ALTERNATE USES:

If you don’t want to use it as a hair mask, you can mix the gel with any shampoo of your choice right at the time of shampooing. Alternatively, you can mix the pure gel with your hair conditioner right at that time and use it.

Aloe Vera Gel Other Hair benefits:

People suffering from excessive hair loss/thinning hair or any scalp infections will also benefit from these hair masks as Aloe Vera promotes hair growth and also helps regeneration of hair in bald areas on the scalp. 

You can add a few drops of any essential oils of your choice to the hair mask. The internet is full of information on this so go and research on more uses.

Caution: 

Like with everything else, there can be a small fraction of people to whom this plant may not suit. I have very sensitive skin and did not feel any irritation. While extracting the gel, sometimes I feel a slight scratchy feeling in my palms similar to what you feel when chopping lady fingers or any sticky vegetable. But it went away as soon as I washed my hands with water. If this gel does not suit you, please do NOT use it.

Saturday, October 20, 2012

How to Extract Aloe Vera Gel at Home?

We have many herbs and medicinal plants in our garden and Aloe Vera is one of them. Having an Aloe Vera plant at home is a blessing, since this is such a wonder plant and requires minimal maintenance. Just water it every few days and it will stay happy and green. It dries up in winters chill if not protected or covered.

Aloe Vera Plant

I have seen it flower rarely, like probably once in a year. Here's how the Aloe Vera flower-stick looks.

Aloe Vera Flowers

Extracting pure Aloe Vera gel at home is very easy. Also fresh gel is much more effective for the skin than packed and stored gel available in the market. Here's how to extract Aloe Vera Gel at home.

1. Slice off a big leaf from the outer side of the cluster and thoroughly wash under running water to remove dust.

Aloe Vera Leaf Oozing Aloe Vera Gel

2. The gel on the open end of the leaf will start turning yellow soon after contact with the air. Wash off the yellow gel again with water or just chop off an inch or so.

Aloe Vera Leaf Oozing Aloe Vera Gel

3. Run the knife blade through the thorny edges first. The small teeth at the ends come off easily in one long knife stroke and are not very pricky.

4. Hold the leaf over a wide utensil/container and peel off just like a fruit. If some of the gel remains on the peels, scrape off using the blunt side of the knife. If required, chop the leaf into small easy-to-handle pieces. 

Pure Aloe Vera Gel Crystals

Aloe Vera Leaf Peels

You can dry these Aloe Vera peels under the Sun, preferably covering with a thin cotton or muslin cloth. Then add this dry Aloe Vera Powder to your daily use Talcum Powder. (Throw away the two thorny strips)

5. Cut the gel chunks into small pieces and blend in a mixer-blender (just a few rotations are enough). There will be some chunks left. Remove the liquid into a container and blend the remaining chunks again. It will be a little frothy from blending.

Pure Home-made Aloe Vera Gel

6. Shift to a clean container with a lid and refrigerate. Make sure your hands are clean. The froth will settle after some time. And your pure home-made Aloe Vera gel is ready. 

Pure Home-made Aloe Vera Gel Storage

Pure Home-made Aloe Vera Gel

The only time goes into peeling and scraping off the gel (5-10 min). Blending takes just 2 minutes. It smells of the Aloe Vera plant but the smell is not strong or unpleasant. When you apply on skin, the smell goes away in a few minutes. Without any preservatives, this should last a week or so under refrigeration. Try to use as soon as possible.

If you have some space at home, do keep a plant in a pot or in the earth. It is easily available in any plant nursery or you can get a plantlet from someone who already has an Aloe Vera plant.

How to use this gel as a hair mask? Read HERE
How to use this on Face: Apply neat on face and leave on or wash off after 10 minutes or so. Do NOT go out in the Sun with this on as it may cause photo reaction on the skin on exposure to Sunlight. For more uses, check on the internet.