Showing posts with label Tips. Show all posts

Wednesday, April 3, 2013

How to Make Your Own Natural Loofah Sponge

I am back with another DIY. Let's learn how to make your own 100% natural loofah for exfoliating your body during bathing. A loofah like this costs anywhere between INR 60 to INR 250 in the market, when you can easily get it for free.


I am blessed to have grown up in completely natural surroundings, close to nature. We used to use this loofah often during childhood. A few years ago, I was surprised to see it is beautified and sold in the market for a good price.


Make 100 percent natural loofah sponge


Natural Loofah, loofa or luffa is the fibre of dried bottle gourd. It grows on a vine and is easily available in many countries. In India, it grows in abundance August onwards and is a winter vegetable.

Bottle Gourd loofah
Image Source: 1
If you do not pluck it from the plant, the gourd dries on the vine and looks like this. 
Dried bottle gourd natural loofah

Please note that the plucked bottle gourd bought from the market would NOT dry into this. It needs to dry naturally while hanging from the plant.
Natural loofah sponge from dried bottle gourd
Pull out the fibers to easily remove the dry peel
When you remove the dried peel, you expose this beautiful golden natural loofah. 


Natural Loofah DIY

It is modified into different shapes and the price increases accordingly.

Here I cut it into two pieces simply using a pair of scissors.

DIY natural loofah bath sponge

The bigger half is my loofah. You put a thread or ribbon through it and it looks like the first picture above. Make sure that the cut ends on both sides are not abrasive. It they are sharp, just rub them against a rough surface to smoothen the edges.

HOW TO USE?

Just wet it a little and scrub on the body after applying soap. Else pour your shower gel directly on the wet loofah and scrub. You need to dry it everyday else it will catch fungus and won't last long. If you can get your hands on it in a village/kitchen garden or anywhere else, make many loofahs and stock them. Replace whenever required.

Now let's see what I did with the smaller half.


Ta da, you can be creative and make many other things out of it. Varnish it. You can even dip-dye it in food color or cloth color and make colored flowers in a dry flower arrangement. I used to do that as a kid and they look really beautiful.


Natural loofah sponge flowers how to make
Loofah Flowers dipped dyed in food color


Natural loofah flowers dip dyed how to
Leave them to drip dry hanging from a cloth line

OTHER USES:
  • You can turn it into powder using a mixer blender and keep in the bathroom. Just add to your shower gel when you want to use it as a body polish. It is the same natural loofah power which is also used in The Body Shop body polish and other brands. I think it may be a little too abrasive to use on the face, so do NOT use in a face wash.
  • You can use it as a scrubber when washing utensils.
  • If you know soap making, turn it into a loofah soap :) See THIS interesting loofah soap-making article.
  • Use it as a moss for small indoor creeper plants. Else tie many of these around a long rod and fix it into a pot for your money plant or other creepers to creep up.
Loofah Soap
How did you like this article. Do let me know :)

The ZINIO international giveaway is now closed and the winners have been announced on our Facebook Page.

Friday, March 29, 2013

DIY Natural Skin Serum for Oily Combination Skin

Today I am going to share with you a 100% natural DIY Skin Serum for Oily or Combination skin, also helpful for people with an Oily T-Zone. It acts as a skin lightening, brightening and pore tightening serum. I am sure most of us know about it but we haven't recognized its true worth.

I am taking about the natural serum extracted from Orange Peel. When you peel an orange, you must have noticed small droplets of liquid suddenly squirting out into the air, and the heavenly smell of orange spreads around. Some of this liquid also settles on your hands most times.

DIY Natural Skin Serum for Oily Combination Skin

This serum is a nectar gifted to us by Mother Nature. As a kid, whenever we used to eat oranges, we used to spritz this serum into each others' eyes for fun.

100% Natural Skin Serum for Oily Combination Skin
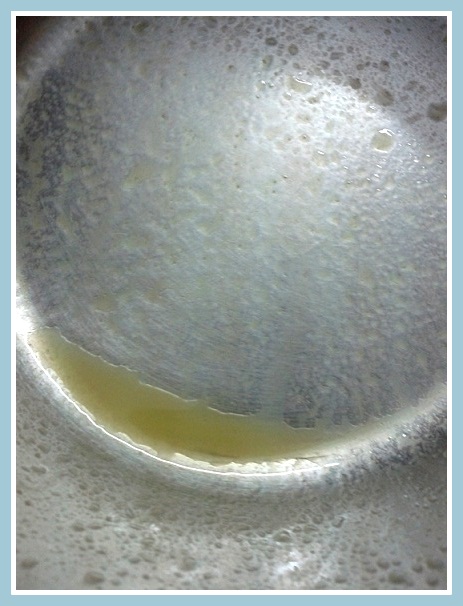
Can you see the droplets I squeezed out?
HOW TO EXTRACT?

I am sure we all already know how to do this :) Still explaining with tips.

Take a clean deep bowl or a big plate. Peel an orange. Fold and bend a small piece of the Orange peel near the surface of the utensil. Small droplets of orange serum will squirt out and settle on the plate/bowl.

How to extract natural skin serum from orange peel

Similarly spray out the drops from all the bits of the peel. Also collect any  remaining liquid on the peel and fingers by scraping against the edge of the bowl. Tilt the utensil so all drops flow down to one place.

Orange peel skin serum for skin lightening, brightening and pore tightening

This is the serum extracted from the peel of one medium sized orange. Don't laugh at the amount. This much is enough to lavishly cover your face and even part of your neck. It spreads really well and is quite strong. So even a few drops are very precious and useful.

HOW TO USE THIS NATURAL SKIN SERUM?

Apply immediately to face and neck, just like you spread water on face. Leave for 3-5 minutes and enjoy the heavenly scent, while you relax or do your work. Wash with plain water and preferably let the skin air dry.

People with an Oily T-zone: If it dries out the skin on your remaining face, use only on the T-Zone.

This skin serum may feel a little oily while washing off, but it will actually cleanse the extra oil from your skin. Skin will feel dry for some time after washing. It will start glowing within half an hour or so. People with very dry skin can give it a try too and see if it does not dry them out too much.

BENEFITS:
  • 100% Natural and Easily available
  • Free of Cost
  • Contains Orange essential Oil (pure Vitamin C)
  • You will notice glow on your face within one use
  • I noticed tightened skin pores from 1st time itself
  • It starts lightening dark spots/scars from wounds/pimples within 2 uses onwards.
  • Naturally exfoliates skin to reveal beautiful skin the next day
  • It is not at all messy.
  • Leaves a cooling sensation on the skin.
  • The natural aroma of orange lingers on your skin for quite long.
So next time you eat an orange, you now know what to do with the peels.

Did you know dried and powdered orange peel is also used in face packs and fresh orange peel is used in cakes and other dishes? But please make sure to wash any dust before using.

Oranges are in abundance at present (at least in North India). If you have oranges easily available, do try this skin serum and let me know if this benefits you too. I will be happy to know.

Sunday, November 4, 2012

Contact Lenses and MakeUp

I remember years ago when someone would get a new pair of contact lenses, the doctor would definitely tell them two things: Do NOT wear eye makeup and do NOT keep long nails. We have come quite far from those times and both contact lenses and makeup have evolved much since then.
Contact lenses, Nails and Eye Makeup
If you wear soft contact lenses (I don't know anybody who still wears the old conventional hard lenses), you can definitely wear eye make-up. Just make sure to follow these basic tips and rules for the most comfortable and healthy experience with eye makeup:

THE DOs:
  • Wear your contact lenses BEFORE you start applying makeup and remove them BEFORE you start removing makeup. Most contact lens advertisements show models with heavy eye-makeup inserting lenses, which is a wrong representation. Lenses: FIRST IN FIRST OUT.
  • If you like to wear makeup on your waterline, please do some good research before buying your eye-makeup. Use only opthalmologically tested eye makeup on waterline.
  • Do not use liquid eyeliner on waterline as it may get into the eye when wet and may also get under the lens if it flakes on drying.
  • Use oil-free and fragrance-free eye makeup. Do NOT use eye pencils/Kajals that emit fumes and make your eyes water.
  • Avoid wooden eye pencils that require sharpening. The sharp wooden edges may tear your lenses while applying makeup and you won't even come to know. Use twist up pencils (Eg Chambor stay on waterproof eyeliner pencil) or makeup brushes to apply makeup.
  • Use waterproof mascara and eyeliner even though it requires extra time to remove and also a makeup remover. I personally prefer waterproof eye makeup as it does not get into your eyes even if you happen to get wet or if you are the emotional kinds who cries a lot;)
  • Apply eye shadow and liner gently, so you don't put pressure on your eyelid ending up damaging your lenses.
  • Try applying mascara, starting from a little far from the base of lashes. Avoid mascaras with lash-building formula as they contain nylon fibres which may wither and fall into the eyes, scratching both the eye and the lenses.
  • Use a good eye shadow primer to make your eye shadow stay longer and to prevent eye shadow particles from falling into the eyes.
  • Replace eyeliner and mascara every three months. Most eye makeup is anyways meant to be used within 3-6 months of opening but people usually keep using it for longer, which is not good.
  • Always use clean hands to apply eye makeup to prevent eye infections and store makeup in a cool, dark place away from dust.
  • If you wear contact lenses first thing in the morning till very late in the night, don't use oil based makeup remover as the oil remains in the eye and eyelids and may cause blurry vision and also deposit on lenses.
  • Remove all eye makeup every day using a hypoallergenic and oil-free makeup remover, no matter how tired you are.
  • Try to place your dressing table/ makeup mirror in a well-lit area so you do not have to widen your eyes to be able to see clearly while applying eye makeup.
  • Never ever touch the tip of the lens solution bottle while doing makeup or otherwise as this may contaminate the solution.
Contact lenses and Eye Makeup

MAKEUP DON'Ts
  • Don't wear eye lenses and eye makeup if your eyes are red, swollen, watering or infected.
  • Don't share eye makeup.
  • Don't share contact lenses.
  • Avoid powder makeup or non-opthalmologically tested products on your waterline.
  • Do NOT wear your lenses when you go to a hair salon. Any fumes from the sprays used there can damage your lenses.
  • Do NOT wear your lenses when getting your hair colored, permed or any other chemical treatment.
  • Do NOT use aerosols (hairspray, deodorants etc.) with your eyes open, when wearing lenses. Just close your eyes when spraying and immediately move away from that room as the aerosol particles will remain in the air for some time after the spray.
  • Do NOT wear lenses with freshly applied nailpaint on your fingers, if your nail paint smells highly of chemical fumes. Or apply nailpaint after wearing lenses.
What to do if you experience redness/irritation?

Take off your lenses immediately. Causes of irritation could be:
  • Torn or broken lens
  • Make-up or eyelashes trapped under your lens
  • High level of protein deposits or makeup debris on your lenses
  • Prolonged wear beyond the recommended hours (particularly for conventional yearly lenses and not for disposable lenses)
  • Dryness in the eyes because of working in dry weather conditions or sitting long hours in front of computer.
Feel free to go to a doctor if problem still persists.

GOOD NEWS FOR CONTACT LENS WEARERS: 

Do you know that people who wear contact lenses can actually do their eye makeup more confidently and comfortably, since they will have a very steady hand at that as compared to people who don't wear lenses?
Contact lenses and Eye Makeup

Human body is designed such that when an object or your hand approaches near your eyes, the eyes send signals to the brain that a 'foreign' body is approaching and brain tells the eyelids to shut and protect the eyes. This is why hands shake and eyelids flutter when you try to apply eyeliner and many women are not able to apply neat eyeliner because of this.

When people are trained to wear contact lenses, the eyes slowly adapt to the hand coming near the eyes and putting the lenses inside. So they stop seeing your hand as a 'foreign' body and no longer 'react' when you bring your hand near your eyes to do eye makeup :)

WHAT TO DO IF EYELINER OR EYE MAKEUP GETS INTO EYES?

If ever eyeliner or eye makeup gets into your eyes and under the lens, and also smears your lens, remove the lens immediately. Wipe clean the eye with a cloth/towel dipped in clean water. Do not dash water into the eye to avoid the rest of the makeup getting into eyes. 

Clean the lens with lens solution. If the eye is still watering a lot, try wearing the lens again only after some time gap.

Call your eye care professional if you have any redness, pain, swelling or irritation.

CONTACT LENSES AND LONG NAILS:

Contact lens wearers are asked NOT to keep long Nails though I do NOT know a single woman who would like to agree to that :) If you like to keep long nails, please take extra care and patience while cleaning, rinsing and wearing/removing your lenses. Nails can damage/cut your soft lenses. Sometimes there is such a minute damage in the outer circumference of the lens that you can't even figure out but it stings like needles in the eyes. So please be careful even if it is like second nature to you.

OPTHALMOLOGICALLY SAFE EYE MAKEUP:

Maybelline eye-makeup is good and cheaper, but it is not opthalmologically tested and also stings on the waterline, therefore unsafe for contact lens wearers. A few Revlon products also sting eyes badly (Eg Revlon Fabuliner). 

Many good brands (L'Oreal, Chambor etc.) make opthalmologically tested eye makeup which is safe for contact lens wearers, just do your research. Read many product reviews before buying eye makeup. It definitely pays.

Please share any other valuable points you know of. Thanks for reading!

For more information on contact lens care and handling, please read the previous article HERE.

Thursday, September 20, 2012

Alternate Uses for your Makeup and Toiletries

Ever thought your makeup and toiletries can be used beyond their usual purpose? Of course, a lot of these items can be multifunctional, if we give it a thought. Here are some alternate ways you can use your toiletries and makeup:

Disclaimer: The images used in this post are for illustration only. They are meant to be used as generic images for the items discussed and are in way associated with any brand promotion. You can use any item from any brand to achieve these results.

 Nail polish remover  
Other Alternative uses of Nail Polish Remover

Nail polish remover can be used to remove stubborn sticker gum from utensils and other articles. A few years ago I bought cutlery and there were stickers around the neck of each spoon and fork. I tried every possible thing to remove the black gum left behind but it won’t come off. Finally, I tried nail polish remover and it came off in a jiffy. It can also be used to remove paint and nail polish stains from certain surfaces.

 Talcum powder 

Alternative uses of Talcum Powder

Ever got your dress spoilt with curry stains while attending a party? Simply sprinkle a lot of talcum powder on the stain and rub it in. It will immediately absorb most of the oil and the food color. Scrape off the yellowish greasy powder and then sprinkle and rub more powder into the stain. Fold it away keeping the stained side up so it does not spoil the rest of the dress. By next day the stain would be gone or almost gone. The sooner you treat it with talcum powder the better the results.

Works like magic for the worst grease spots on Silk.

 Bleach activator powder 

other alternative uses of bleach

When you are knocked down with bad cold with runny nose and can hardly open your eyes, simply sniff some activator powder that comes with your facial bleach cream. Usually a lot of this is left over after your cream is used up. This has ammonia and the strong smell instantly shoots up to your brain and gives immediate relief. Learnt this in the chemistry lab during school time.

 Cleansing Milk 

Other Alternative uses of cleansing milk

Cleansing milk is an excellent cleanser for leather goods from shoes to wallets to belts to bags, jackets, handbags… anything leather. Simply put some cleansing milk on a ball of cotton and cleanse the leather item like you would clean your face with it. For difficult to reach areas in your purse folds, clean using a Q-tip/ear bud dipped in cleansing milk. Gives new life to leather items. Helps remove the fungus during rainy reason. Have been doing this since school time.

 Nail Polish 
Alrernative multiple uses of nail polish
 This has multiple uses

Seals cuts in skin: When I get a cut in my skin and have to do laundry or dishes or anything that involves the cut’s contact with water, simple Band aid comes off, even the water proof one doesn’t stay for long. I simply cover the cut with some nail paint. Colored or clear nail paint is your choice. That seals the cut, prevents the water from getting in and helps speed up the recovery. Burns for a few seconds but provides great protection.

Marking for differentiation: When my mom and I are using similar combs, I mark one of them with nail paint to differentiate. Same can be used for utensils when you/your kids go camping and take utensils along, which may mix up with others. You can mark an initial of your name or simply a colored dot on your item.

Marking for exactness: If there is a hot and cold water mixer in your bathroom, use nail polish to mark the exact position of the hot/cold water knobs/lever, at which you get the ideal water temperature. Put a mark/dot on the knob and one on the wall and the two should be opposite, just like you set temperature for your clothes iron.

Color Coding: Anything poisonous in the home can be marked with red nail paint so you can even see from a distance that there is something children need to stay away from.
Alternative uses clean nail paint
Lamination: When I have to courier some documentation, I usually apply clear nail paint on the written name and address just in case it may get rub off with water. It laminates that area. If you are allergic to metal fashion jewelry, simply coat a thin layer of clear nail paint on the area that comes in contact with your skin. Let it dry and you are ready to wear it without the fear of any skin reaction.

Rust proofing: Apply clear nail paint under the base of any metal containers in your kitchen or bathroom, which may spoil the surface with ugly rust stains. You can use old clear nail polishes.

Sealing buttons: Applying clear nail paint on the thread on buttons seals the thread and makes the buttons stay longer on your shirts/dresses. Just be careful when applying, so you don’t drop any on your clothes. If a small thread is coming out of the button, which may just be waiting for a pull to take the button off the shirt, seal it with clear/transparent nail paint as a temporary solution.

Threading a Needle: When your mom or you are finding it difficult to thread a needle, just dip the tip of the thread in a nail paint and wipe off the extra paint between your thumb and finger or with a paper tissue. The tip will harden in a few seconds and you can easily pass it through the eye of the needle. Particularly helpful if you are into jewellery making and at times may not be using a needle to thread the beads together.

 Shampoo 

Shampoo other alternative uses

Shampoos are the best cleanser for your combs, hair brushes and even make up brushes. Just dilute some shampoo and dip the combs/hair brushes/ makeup brushes in it till clean. Usually works within a few minutes and then rinse thoroughly with clear water. You can also directly rub shampoo in the base of wet combs/hair brushes (where there is lint and grime) and leave for some time.

 Astringent 

Alternative use of astringent

Astrigent can be used on insect bites to soothe the stingy feeling.

 Tooth paste 
Alternative uses of toothpaste

Skin Burns: Tooth Paste can be used on skin burns for immediate relief. White toothpaste applied to pimples and left overnight can help dry down the pimple/zit.

Cleaning Silver Jewelry: The traditional white toothpaste can be used to shine blackened silver jewelry. Just rub the silver jewelry with tooth paste and all the blackness starts coming out immediately. Let the jewelry sit for 2 minutes and wash with plain water. Ta da, your silver jewelry sparkles like new! You can also try it on blackened metallic jewelry, works in most cases.

 Hair Dryer 
Other uses of Hair Dryer

If your watch / cellphone or any electronic item happens to get soaked into water and stop functioning, the first thing to do is to switch them off, open and clean with a cloth to soak excess water and then dry up using a hair dryer. That’s what the phone repair companies also do. 

I also used hair dryer to repair my washing machine. I had to dry up a pipe and create vacuum in it before refitting it. Hair dryer did the trick for me.

 Vaseline 
Other multiple Alternative Uses of Petroleum Jelly Vaseline

  • Rub on a stuck zipper to help it run smoothly. 
  • Apply to rusted surfaces/ rusty-squeaky door handles or hinges, to ease up the rust and then wipe clean excess grease. 
  • Vaseline also helps remove eye makeup easily. 
  • Helps dissolve dried up oil curry stain on hard surfaces. If you don’t want to rub off hardened food stains from your precious furniture with wet cloth, just dab some Vaseline and let it become soft. Wipe off with a paper tissue. All the oil and stains should be gone. 
  • If a ring or bangle is stuck on your finger/arm, Vaseline helps to easily ‘slip’ it off your body without hurting you much.


 Mascara and Eyeliner 
Alternative uses of mascara and eyeliner

Mascara can be used to cover a gray hair here and there on special occasions. This is helpful only when you have just a few grey hair, which does not require hair coloring. This needs practice because you can over apply and make your hair hard or you may not be able to apply properly to cover the grey. It does help, but practice in advance. 
            
Old liner brushes can be used during nail art for drawing lines or as a dotting tool or for making intricate designs during pot painting.

Old mascara bottles can be refilled with castor /almond/coconut oil to easily apply to eyelashes at night, particularly during winters. Make sure to clean them thoroughly before using and also that the bottle is made from good quality plastic. Do not re-use Cheap plastic for long.

Bindis can be used for body art, nail art and traditional big red bindis can also be used for doing half moon maincures. For bindis, make sure you stick the bindi a few times to a paper or another surface to reduce the gum for a cleaner manicure.

 Soap Bar 
Other uses of soap bar

Used soap bars can be used to collect tiny glass pieces from the floor. If you happen to break something and can’t find the tiny glass particles, just gently wipe the wet soap bar on the floor and all glass particles will stick to it.

Soap is also helpful to maintain visibility while driving car in mad rainy weather. Scrub some soap in the windshield and it will not let the rain blur your vision. You will need to reapply it frequently as the rain wipes away the previous layer.

I hope you find this article interesting and useful. Do add any more tips you know of, in the comments below.

Monday, August 27, 2012

Products and Expiry dates: All you need to know

How many of us care to check the expiration date on products before buying them? While some like me are quite particular (almost finicky) about these dates, I know a majority of people including many of my own family members, who never care about such things. It just doesn’t come to them naturally. My particularity at times shocks the people around me. Knowing how products are stored and handled in India, I think I am doing the right thing.

Expiry date, shelf life, best before date, use by date difference

The expiration date, shelf life, Use by date, best before dates etc are just a guideline based on expected handling and proper storage of a product. While these are generally taken at face value, please note that these dates DO NOT guarantee the safety/goodness of a product within these time values. A lot depends on how they are stored: temperature, humidity, direct contact with sunlight, re-freezing a melted food product etc etc. A product may go bad much before its expiration date, while another may be quite safe to use even past the mentioned date.

Expiration date and shelf life are used synonymously, but are they the same? The answer is NO. Surprised?

SHELF LIFE/BEST BEFORE DATE:

As the name says, shelf life = time spent by a product on the shelf in a shop, until it is bought and opened by the customer. Shelf life is related to the quality of a product. This means, after the shelf life, the product’s quality/effectiveness reduces, though it may still be good/safe to use. Again, this holds true only if the products are stored in the proper storage conditions as mentioned on the packaging for most products (personal care, cosmetics, medicines, food items etc).

Product expiry dates, use by date, shelf life and best before dates
Food Storage Conditions mentioned on the pack
In case of food, the shelf life is specified by the ‘Best Before’ date.  This means, under proper storage conditions, a food item may still be good to use after the ‘Best before’ date, though it’s quality may have come down in terms of taste, nutritional value, color, appearance, texture etc. 

For example, the normal white or brown bread available in the market has a use by date of 4-5 days from the date of packing. Many times, I have seen fungus on just a 2 days old bread. This is because shopkeepers in India mostly display such food items on racks, out in the scorching heat and humidity, which makes the bread ‘sweat’ and go rancid. So in this case, the product is still within the shelf life, but has been spoilt due to poor storage conditions. On the other hand, a fresh bread bought directly from the bakery, or picked up early morning on the day it was just delivered, can survive months if sealed properly in a good plastic bag and frozen. Similarly, eggs stored in the refrigerator can be used even a few days after the best before date, though it’s flavour/nutritional value may have decreased.

EXPIRY / USE BY DATE:

Expiration date is related to the product safety. NEVER use products after the expiration date as they are NOT SAFE to be consumed after the expiration date. In terms of food, expiration date is mentioned as ‘Use by’ date. The ingredients of such food items usually go rancid quickly and may be dangerous to eat after the Use by date. 

Food items are usually affected by microorganisms which may lead to food poisoning or more serious conditions if consumed after the expiry date. This is particularly true of bread spreads, cheese, sandwich spreads, dressings etc. 

I have seen people blindly buying big packs of fruit juices especially when they are at some discount in stores like Big Bazaar. Under heat and humidity, the fruit juice ferments easily and the packet swells due to the released gases that stay within the closed container. NEVER buy a fluffed up fruit juice packing as it is hazardous to your health and may cause food poisoning. Fermentation makes it equivalent to the ‘desi’ liquor brewed illegally which kills several hundreds every year. In case of medicines though, most pill forms are safe to be used even after the expiry date, it’s just that their effectiveness reduces.

SHELF LIFE GUIDELINES FOR COSMETICS AND TOILETRIES

Make up and personal care items usually have these date guidelines indicated through the picture of an open tub with a number inside it (see the first pic). The number indicates months. This means, once you open the packaging, use the product within those many months. Only a very small percentage of people understand or ever notice this indication. I have seen most people (including beauty specialists at saloons and other people with a very high knowledge of makeup) keep using their makeup items till the expiry date mentioned on them. 

A product may have a shelf life/expiry date of 3 yrs from packing, but once you open it, use it only within the number of months mentioned in the open tub picture. You can go a little beyond this timeline if you store your products as per guidelines, in very good storage conditions. But do not keep using a Kajal or Eyeliners for 3 yrs. Your eyes are more precious than the money you spent on those cosmetics. 

Product expiry dates, use by date, shelf life and best before dates
Open Tub graphic indication of usage period after opening

SOME BASIC TIPS TO INCREASE THE USAGE LIFE OF YOUR PRODUCTS:
  1. Never dilute shampoos by directly putting water into the shampoo bottle (a very common practice in India). If you like to use your shampoo diluted, dilute it in a separate mug.
  2. Never take out conditioner from the tub packing with your wet hands.
  3. Keep your makeup items in a cool, dark place, away from direct sunlight.
  4. Most people carry around eye makeup like Kajal/ liner pencil for touch up during functions and quickly do that with dirty hands. Always wash your hands properly/sanitize before starting to apply makeup, when at home or outside.
  5. Clean the dust off your makeup/toiletry bottles with a clean cloth regularly.
  6. Never leave the lids or covers of makeup/toiletries open unnecessarily.
  7. Avoid touching the tip of eye pencils/Kajals with your hands.
  8. DO NOT share lipsticks, eye makeup, makeup sponges etc.
  9. Once you have opened an item, discard it after you have reached the number of months mentioned in the tub, even if you have used it once or twice. Particularly in case of eye pencils and lipsticks. Lipsticks may still survive longer if stored properly in the fridge.
  10. Always check the date on an item before buying.
  11. Never pour contact lens solution from the bigger bottle into the small sample bottle. Such products may change chemically upon coming in contact with light/air.
  12. In case of food items, always check the storage conditions before buying from a shop/store. Most shop keepers switch off their freezers at night and then switch them on next morning. This adversely affects food items while poor/ignorant customers never suspect this.
I hope this information is helpful and you are welcome to add more information or your valuable comments in the comments section below.

Sunday, August 5, 2012

How to save a 123greetings.com card to your computer?

How to save a 123greetings.com card to your computer?


save 123 greetings

All of you at some time in your life would have received an e-card which you cherished and wanted to keep with you forever. I did and I still like saving my cards. Years ago I used to have Dreamweaver flash on my computer and I could find the card flash movie in my internet Explorer temp files, from where I used to save/edit it using Dreamweaver. But the card company has got smarter and the flash file no longer gets saved when you do a ‘Save Webpage Complete’ and nor does it show in your temp files.
How to save a 123greetings.com card to your computer

Since 123greetings.com is today’s leading free e-cards company, this article is about saving a 123greeting card movie only.You can definitely try this with other e-cards and it should work the same way. Even though the card company says your card will be available for the next 30 days, these days most cards are still on their server for almost a year. Provided you have the email with the card number, you can track it and find it out.

Let’s start saving our e-card. The key is to find the actual .swf (flash) file playing in the card. This is very easy and even a non-technical person can do this.

Disclaimer: I will explain saving it via Internet Explorer (IE) or Google Chrome. I don’t have Firefox but it should work the same way in Firefox too. Also, as obvious, you will need a working internet connection to save your card.

STEP 1: OPEN THE CARD YOU WANT TO SAVE

Open the card by clicking on the card link in the email or by directly copy pasting the link in your internet browser’s address bar. For cards that no longer open with the link, copy the card number from the email and search for it in the 123greetings.com search box to locate the card. See pic below. In the email it says:
You can view it by clicking here:


STEP 2: RIGHT CLICK >> VIEW SOURCE


Let the card load till you see the ‘Play button’. Right-click anywhere on the page outside the card and the advertisement area. Click on ‘View Source’ or press ‘V’ on the keyboard. See pics below. This will open a new tab/window with coding of the card webpage.


In Google Chrome

In Internet Explorer


Step 3: LOCATE THE .swf FILE WITH CTRL+F

Go to the source code page and press Ctrl and F keys together (CTRL + F) to open the search box. Type .swf in the search box and hit ‘Enter’ on keyboard. Make sure you type a dot before swf. You will see .swf highlighted in the coding file. See pic. The third one is your card file. Keep this page open.


This is how it looks in Chrome.  Click on pic to see enlarged view.


This is how it looks in Internet Explorer.  Click on pic to see enlarged view.


Step 4: CREATE AN HTML FILE WITH THE CARD LINK

Now open a new notepad file. Type or copy paste this in the file:
 <a href="">My Card</a>
Click File >> Save As>> myfavcard.html (give any name to the file and change the file extension from .txt to .html). Choose a folder to save the file. See pic. For those who understand this, we do this when the ‘Save target as’ option doesn't work directly.


Save file as .html. Click on pic to see enlarged view.

Step 5: COPY PASTE THE CARD LINK IN NOTEPAD HTML FILE

Now go back to the Source code file where we had located the card link. Copy the card link. Come back and paste the link in the notepad HTML file within the qutoes, as shown below. The link is the text right after ‘crdName=’up to .swf. Save the notepad HTML file again.

Tips: Use Alt+Tab keys to move between windows.
Use Ctrl+S to save file OR Click on File >> Save.


Copy the card link from the Source Code File. Click on pic to see enlarged view.

Step 6: SAVE THE TARGET FILE AND YOU ARE DONE

This is the last step. You can close all other windows if you want. Go to the folder where you had saved the HTML file in Step 5. Open the HTML file. Right click on the text (My Card) in the file and click on ‘Save Target As’. It will show a download window and another window where you can change the file name if you want. Then click on Save to save the flash card movie file to your computer.
My Saved HTML file on my Desktop.

The Target file is your actual card movie. Click on pic to see enlarged view.
Save the Flash movie file to your computer. Click on pic to see enlarged view.

Download Complete means the file is now saved on your comp. Click on pic to see enlarged view.
STEP 7 (OPTIONAL): SAVE THE ORIGINAL CARD AS A PRINTABLE .PDF FILE


Many of us will have emotional values attached to the message written in the card by the sender. Every card has a ‘Save as pdf’ link below it. Click on that to save the card as a printable .pdf file. (This type of file opens only in Adobe Reader or any PDF reader). The whole card will be saved as such and the last frame of the movie is saved in the printable .pdf file.

Save original card with names and message as .pdf file

Hope this is helpful. If you have any questions or get stuck at any point, ask me in the comments or send me an email from the ‘Contact’ tab above.